Edit agents
To edit an agent, follow these steps:
-
Go to the
Cammerssection: Navigate to theCammerssection in the admin platform.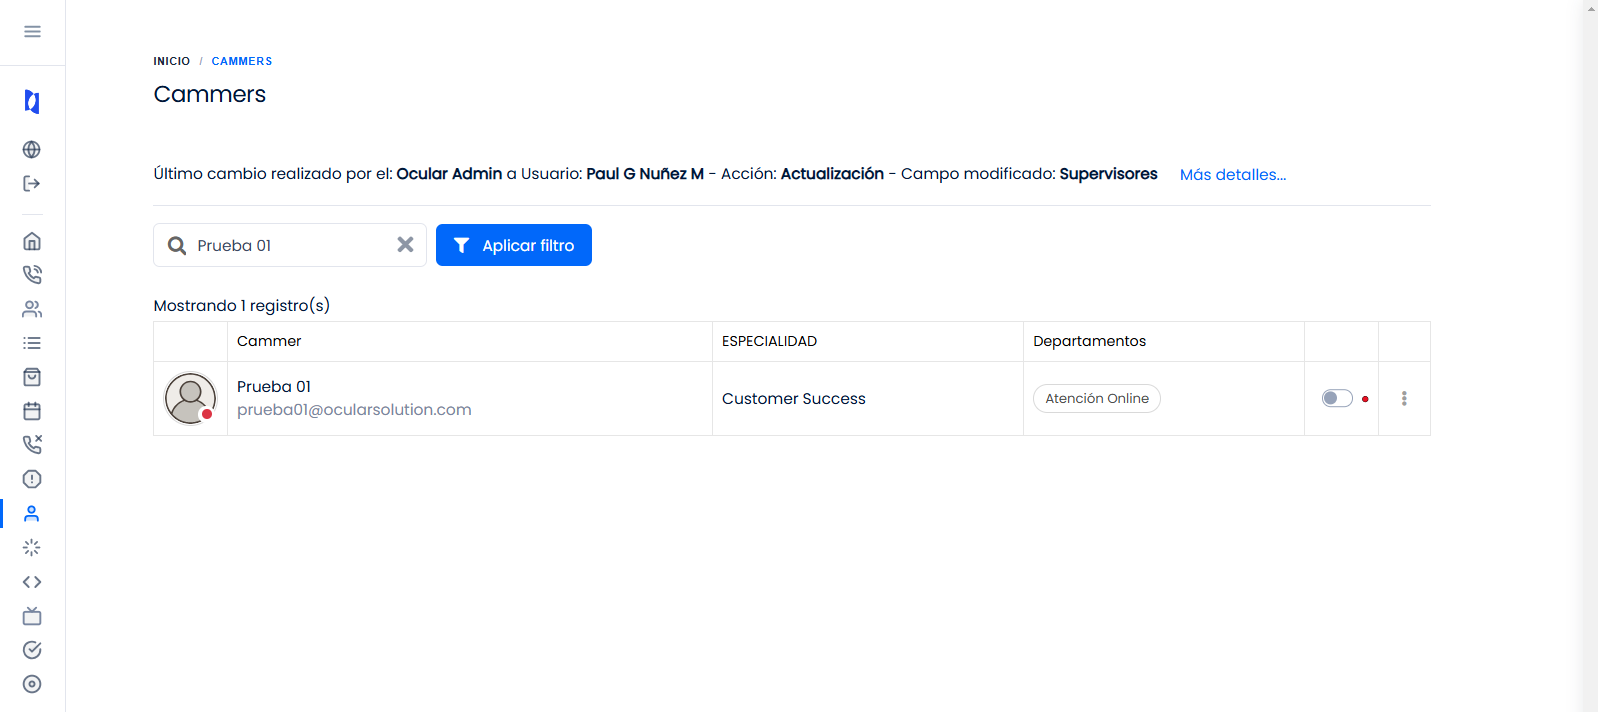
-
Select the cammer to modify: In the list of available cammers, click the name of the cammer you want to edit. This opens the edit page for the selected cammer.
-
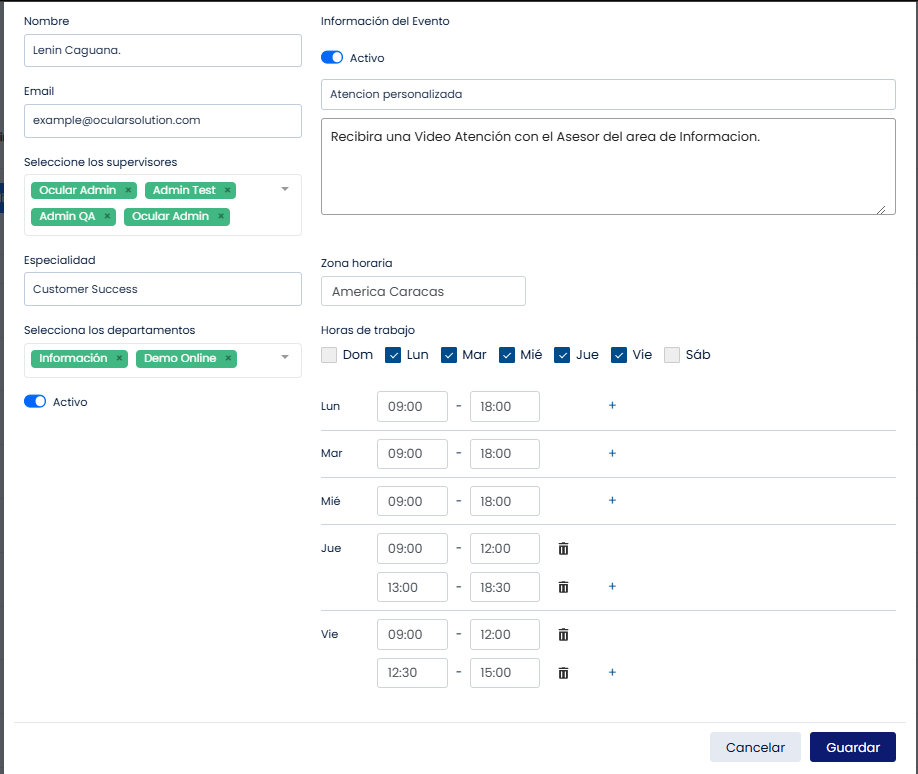
Enable or disable the cammer: On the edit page, you will find a checkbox that indicates whether the cammer is active or not. Checking or unchecking this checkbox controls several critical features:
- No appointments assigned: If the cammer is disabled, no new appointments will be assigned to them. This is useful for managing the cammer's availability.
- No incoming calls: A disabled cammer cannot receive calls, which ensures they are not interrupted while inactive.
- Not listed in the transfer list: Disabled cammers will not appear in other cammers' transfer list, which prevents calls or tasks from being transferred to them.
-
Additional settings: On the edit screen, the following additional settings can be configured for a cammer:
- Name and email: Change the cammer's name and email address.
- Specialties: Assign or change the specialties the cammer belongs to.
- Calendar event name: Set the name of the calendar event associated with the cammer.
- Schedule availability: If this module is enabled, configure the cammer's schedule availability.
-
Save the changes: After making the necessary changes, make sure to click the
Savebutton to apply them.
By following these steps, you can effectively manage the availability and features of cammers in the admin platform.